Apart from capturing beautiful moments on the wedding day, producing a memorable wedding video highlight reel is no doubt a Melbourne wedding videographer’s most important task after the wedding. A good wedding highlight reel showcases the essence and key moments of the couple’s wedding day, and it is also seemed as a benchmark indicator of a wedding videographer’s skillset.
How do I edit a breathtaking wedding highlight reel efficiently?’ As a veteran Melbourne wedding videographer who has had more hundreds of happy couples, this is one of the most common questions that I got asked. As mentioned, a quality wedding highlight reel not only means you will earn a happy customer, it will also bring you lots of future clients. Lastly, efficiency is also a major factor when editing video highlight as during busy wedding seasons, a wedding videographer may have up to 3 or 4 weddings per week. The ability to edit a video highlight efficiently without comprising the quality will lower your cost and let you focus on bringing more value into your business.
Whether you are someone who just started to do wedding videography field or who already had years of experience. I believe this ultimate wedding highlight reel editing guide will be helpful to you in many ways. So, let’s waste no time and get started.
What is a wedding highlight
To edit a quality wedding video, it is essential to understand what is a wedding highlight.
In simple words, a wedding highlight reel is a short 4 to 5-mintues movie trailers which reflect the best moments on your wedding day and showcased in an artistic manner with music of couple’s choice.
Here is an example of a wedding highlight:
How to edit wedding highlight | Step by Step
After watching the sample wedding highlight above, I’m sure you have got some rough ideas on what is a wedding highlight reel. Now, once you are ready, we can start the step-by-step guide on editing your first wedding highlight reel.
Two essential elements of a wedding video highlight
A wedding highlight reel consists of two essential part which are:
- Sound (music and voiceover)
- Video footages
It may sound oblivious, but for a great wedding highlight reel, it is essentially a perfect combination of both the sound and the videos.
2 types of wedding video highlight
From my editing experiences, there are mainly 2 types of wedding video highlights, which are the voice overed and non-voice overed.
Voice overed video: use speech or vows to narrate the wedding highlight reel while the music playing in the background
Non-voice overed video: no speeches, the music is played solely throughout the video
Deciding which type video to edit
However, one question that every wedding video editor runs onto is ‘how do I know which type of wedding highlight reel should I make and will my couple be happy about my choice?’
To be honest, I have the same concern when I started my work as a Melbourne wedding videographer. However, with years of editing, I have some experiences to show with you on choosing the editing style. Here is a basic table I made to help you with the decision.
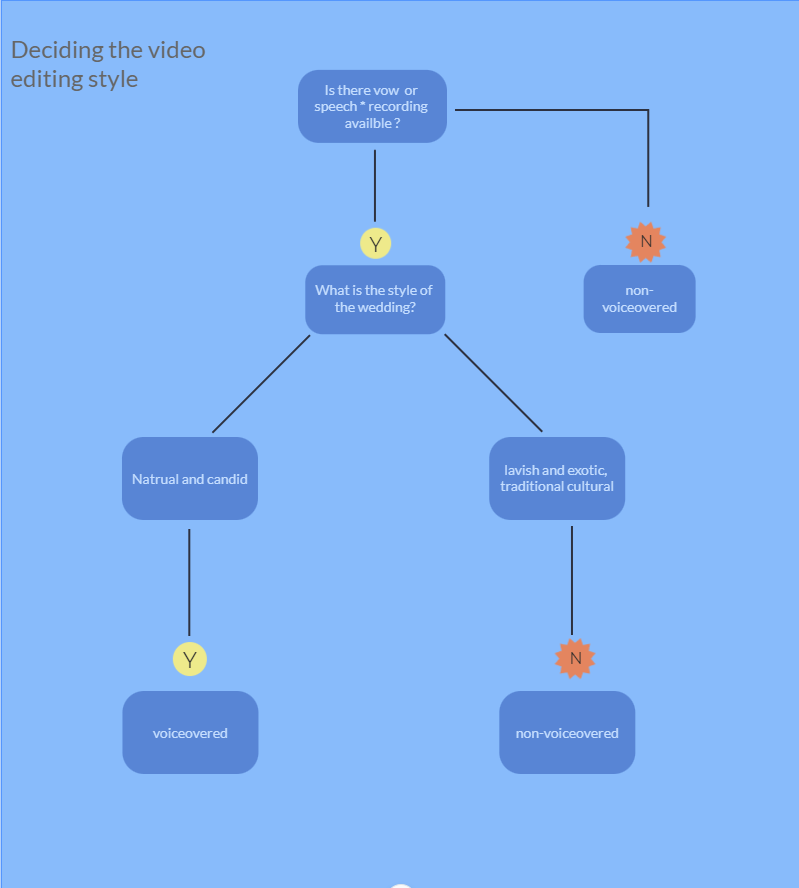
Wedding highlight reel editing – Step by step guide

Though you might already have looked at the graph attached above but still cannot get a clear idea on how to put everything together, here is the ultimate step by step guide of editing your wedding highlight video.

Step 1: Selecting and trimming music for your wedding highlight reel
You might be surprised that the first step of editing the wedding highlight video is not finding the right footages but getting the music. In fact, as a senior wedding video editor, I find many people overlook the importance of music to the whole production.
Preparing and trimming the music allows you to set a rough outline of your wedding video. TREE Studio’s clients will usually provide 3 songs for the editors for the wedding video, so the first step is to choose the best music for the wedding video: generally, we would use 2 songs for making the wedding highlight reel and we would choose a romantic and slow-paced one as the first song for the morning getting ready and ceremony part and an upbeat, party-vibe song as the second song for the after-ceremony part.
Next up, depending on the clients wedding videography package, you will need to trim the music down to the appropriate length as the length of two songs put together is usually well over 6 minutes. Although we call this trimming, we don’t just simply cut the end of the second music to make it shorter. Instead, we will cut out the end of the first song as well as the head of the second song, and make it slightly overlapped with the first song. In this way, rather than hearing a sudden stop when approaching the end, we can use the proper ending of the second song to provide smoother hearing experience.

(Song 2’s head is chopped and slightly overlapped with the first song)
2. Preparing your voiceovers for the morning getting ready
If you decide to use voiceovers such as vows for the morning getting ready, it is then time for you to prepare them. Synchronize the wedding ceremony footages using Plural Eyes and select the part where the bride and groom each speak their own vows. (You may find the detailed guide on how to synchronize wedding footages in my complete live footage editing guide here).
It is also worthwhile to note that the bride’s voiceover is played during the groom getting ready and the groom’s vow played during the bridal getting ready. This way we can create an effect as if the couple is talking to each other.
3. Composing the wedding video highlight
After the music and voiceovers are ready, it is finally for you to add in the main ingredients: the footages. Mostly of our wedding highlights run in time logic, meaning the video shows the story of the wedding in time order (morning to night). So you may basically follow the order of the footages that the videographer captured on the day.
Here you can find the main components of a time-oriented wedding video highlights, you may also refer them to the graph that is attached above:
- The movie trailer start: shots of just the bride and groom
- Bride and groom getting ready
- Transition b-roll of ceremony decoration
- Wedding ceremony
- Group photo
- Wedding location photo
- Transition b-roll of Wedding reception decoration
- Wedding reception
- Ending (optional)
4. Adjusting the sounds
After you have finished adding in all the footages, we have finally come to the steps of polishing your wedding highlight reel. The first step of the polishing is to adjust the sounds, this includes:
- The loudness of the music
- The loudness of the voiceover in contrast to music
- The transition between song 1 and 2
The loudness of the music
Firstly, we will need to ensure the music are adjusted in approiate loudness, that is not too loud or too quiet, and the two songs should have consistent loudness as well. There are 2 good indicators of whether the music is in appropriate loudness, 1 is the wave curve of the file in green colour and the sound bar on the right of your timeline. You will need to adjust the gain of the song using (CTRL+G) until you find the wave curve nicely spread out on the file and the sound bar hits between -3 to -16 range. Here is an example of a well-adjusted sound track:
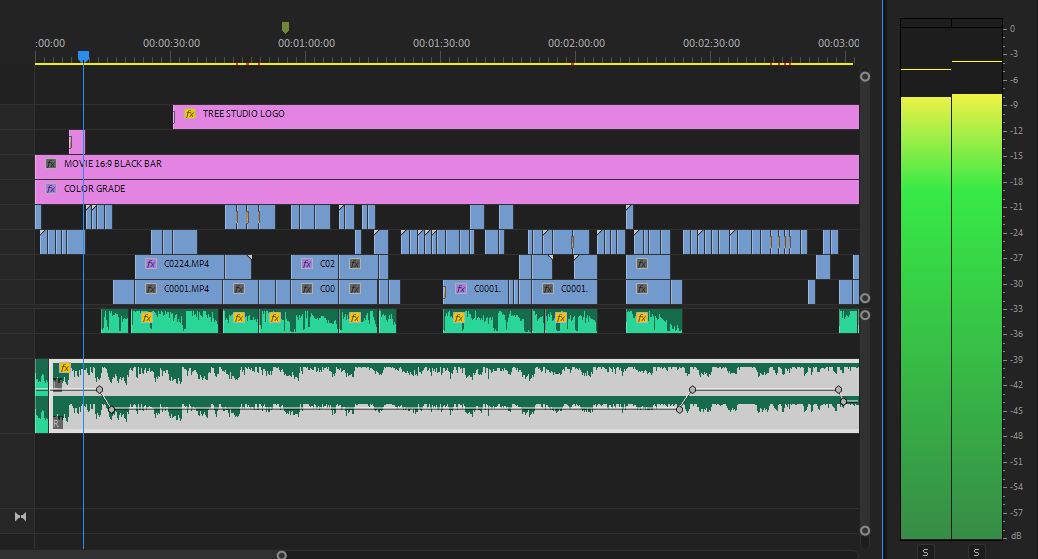

(Left: too quiet, right: too loud)
The loudness of the voiceover in contrast to music
The second step is to tweaking the volume of the voiceover: we will need to lower down the volume of the music in order to let the audience hear the voiceover clearly. To lower down the music, we use the volume ramp to ease in and ease out the change of the gain of the music. As you can see in the graph attached below, first you make anchor point on the music track, and then drag down the volume where the voiceover begins. Do not forget to resume the volume of the music when the voiceover finishes.

The transition between song 1 and 2
Lastly, we need to create a smooth in/out effect for transitioning song 1 into song 2. You can use either volume ramp or exponential fade effect on the end of song 1 and head of song 2 to create a smoothing effect. But you might still find the transitioning is a bit harsh. Here is one secret trick: I always use footages such as bride and groom first kiss, group photo or walking out of the ceremony during the music transition point, this is because I can use the cheering sound of the crowd to cover the music transition.
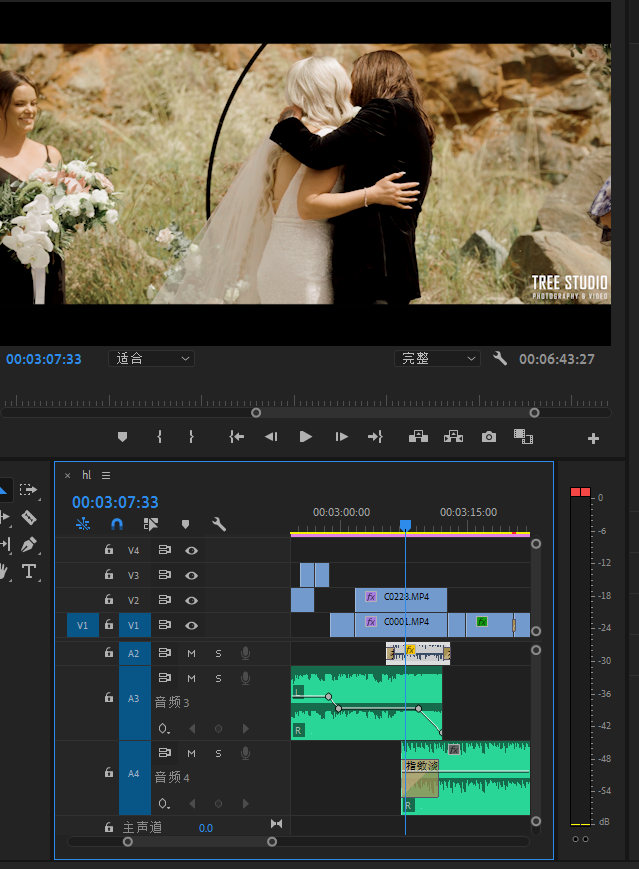
(The highlighted sound track is the guest cheering song to cover the transition)
Adding in effects
The second step of polishing is adding effects, here you can find the table of the most commonly used video effects:
| Using scene | Effect name |
| Repetitive shots transition | Impact light leaks/flare |
| Ending | Dip to black |
| Not stable shots | Warp stabilizer |
| Transitioning | Cross dissolve |
Adding in name
The second last thing to do is adding the name near the end of the trailer, so everyone who watch the video will know the bride and groom’s name. Find a appropriate footage before the getting ready, then use the Text tool to type in the name of the bride and groom.
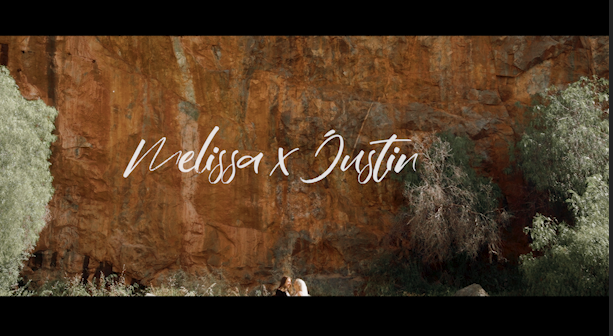
Colour grading
Finally, we have almost come to the end of the wedding highlight video making, the last thing we need to do is to colour grade and enhance the video before sending it to your clients. Colour grading is very important as it adds in unique and artistic aspect to your wedding video production.
Go into the colour panel on Adobe Premiere Pro, and start adjusting the parameters of each footage. The main parameters you need to check is:
- Exposure
- Contrast
- Highlight/shadow
- White balance
As most of our wedding videos are shot in Sony Slog2, I find generally we need to add in heavy contrast to make the subject ‘pop out’. However, if you still not very familiar with colour grading, a tool called Lumetri scope is very useful to let you know if your footage is ‘contrasty’ enough. You may find it in the window on the top left colour of the panel.

As you can see from this example graph of a well-tuned footage, the wave curves spread nicely throughout the 0 – 100 range, meaning you are getting lots of details between black (0) and white (100). And in contrast, you may find the lumetri scope of the raw footage below.

Apart from the contrast, another important parameter is the white balance which is basically how blue/yellow the footage looks like. One trick to adjust the white balance to just right is to find the white object in the footage and adjust based on that white. You can also used the white balance picker tool to quickly adjust.
The requirement of a wedding video highlight
Like any product and goods, a wedding video highlight is a production from your wedding videography service, which means there are attributes that define the quality of the wedding video highlight you produced.
Based on years of making wedding highlight reels, here is a list of the most essential requirements that most couples will look for regarding to their wedding video. When you are editing your wedding highlight reel, it is worthwhile to check this table to ensure your wedding video will at least meet the couple’s standard and expectation.
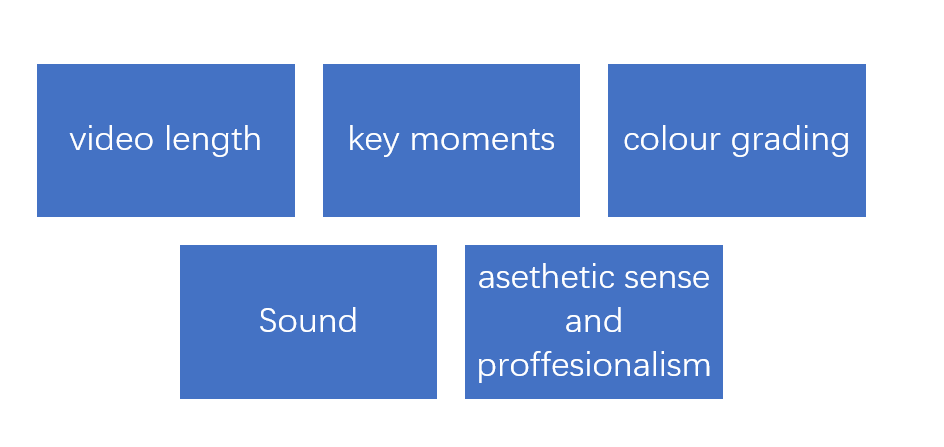
Video length
Most of the wedding highlight reel last around 4 minutes, according to William H’s survey, once the video length passes the 5 minutes mark, the attention from the viewer will drop significantly as they will be bored due to human nature. On the other side, videos shorter than 3 minutes are not acceptable because most likely lots of important moments on the wedding day will be missed.
Overall, your wedding video highlight reel’s length should be determined based on the coverage length on the wedding day. And according to different wedding videography packages offered by TREE STUDIO, couples will expect different length of videos based on the package they chose. Here is a table on appropriate highlight reel length for your reference.
| Coverage length | Optimal wedding highlight length(minute) |
| 6hr | 3:30 – 4:00 |
| 8hr | 4:00 – 5:00 |
| 10hr | 5:30 – 6:00 |
| 14hr+ | 7:00 + |
Key moments
Remember, no matter in which way a wedding is planned, it is still a formal event that represent the marriage of two people. So apart from the creative, artistic footages that you captured and decide to edit into the wedding highlight reel (e.g. the couple having fun and kissing each other), key moments are the compulsory and most essential footages that every couple expect to see in their wedding highlight reel.
Here is a table of the key moments listed in time order and when editing I find it helpful if we use the key moments as the backbone structure and then fill in those artistic footages to make the video look interesting. Also, If you just joined the wedding industry, I would strongly suggest you to familiarize yourself with this complete wedding timeline guide, so everything below will make much more sense.
Getting ready
- accessories (especially groom’s jacket and bridal gown)
- bride and groom getting ready
- bridal party *
- wearing pocket flowers for parents*
Wedding ceremony
- decoration and ‘wide b-roll footages’ of the venue
- groom chatting and waiting for bride
- bride getting off the car with dad*
- footages of every bridesmaid and bride walking down the aisle
- ring exchange and first kiss
- bride and groom signing marriage certificate
- bride and groom walking out
- a group shot of all guests and newly wed
wedding photo location
- bride and groom footages, with their bridal party
Wedding reception
- ‘Wide b-roll footages’ of the venue
- Decorations of the wedding (especially cake, bridal table, dancefloor and the centrepiece hanging from top*)
- Bridal party entrance followed by bride and groom entrance
- Cake cutting
- First dance (use footages from different angels, you may want to sync the footages first)
- Dance with parents *
- Bride and groom dancing with all guests
- Bouquet tosses and garter *
- Bride and groom exit *
*: means if applicable. As not every wedding will involve this process.
Colour grading
Ensure the colour correction of the entire video is acceptable and consistent. The 3 most important parameters are:
- Exposure
- Colour temperature
- Contrast
Sound
Ensure the sound volume is consistent and acceptable. The song transition is smooth and not noticeable. The voiceover can be heard clearly.
Aesthetic sense and professionalism
Ensure the wedding video looks professionally edited. This is pretty much the last step you should check after you almost finish editing your wedding highlight reel. You may want to check the flow of the video is smooth, each section of the wedding day took a balanced amount out of the whole video.
What to avoid:
- Weird facial expression/pose shots of the bride and groom
- Shaking and zooming in/out footages
- Imbalanced section (e.g. only 10 seconds of the night reception part)
I am glad that you make all the way to here, and hopefully by now, you have got better and clearer idea on how to edit wedding video highlight. If you have any question that is not covered in this article when editing your wedding video, feel free to contact us.


