What is the NAS/ cloud System?
The NAS system is a device storage connecting the internal network and internet which allows users from different locations to access files.
The NAS system uses its own cloud system which it has similar functions as Google drive and Dropbox. The private cloud of NAS system has much more advantage than the Google drive, the NAS system offers larger, faster and more secured storage.
The NAS system is used widely in a professional wedding photography company in Melbourne, IT company and multimedia studio.
Now, let me show you how to use the NAS system to preview and download your Melbourne wedding photography and video.
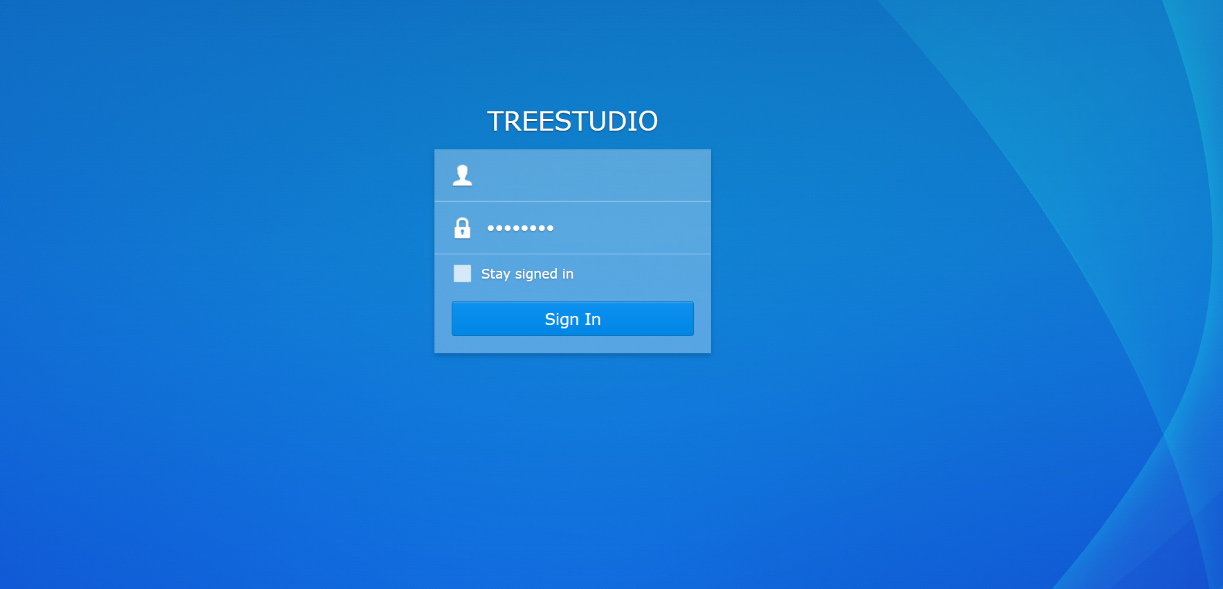
Step 1. Log in your account and password to view the wedding photography

Figure 1 NAS Cloud system login page
Every Melbourne bride and groom will be given their own account and password. The log in page will look like the screenshot above.
Just keep in patient while the system logging you in, the system normally has 2-3 seconds loading time when multiple users are accessing our system at the same time.
You can also tick the Stay signed in if you don’t want to type the password every time when you log in the system.
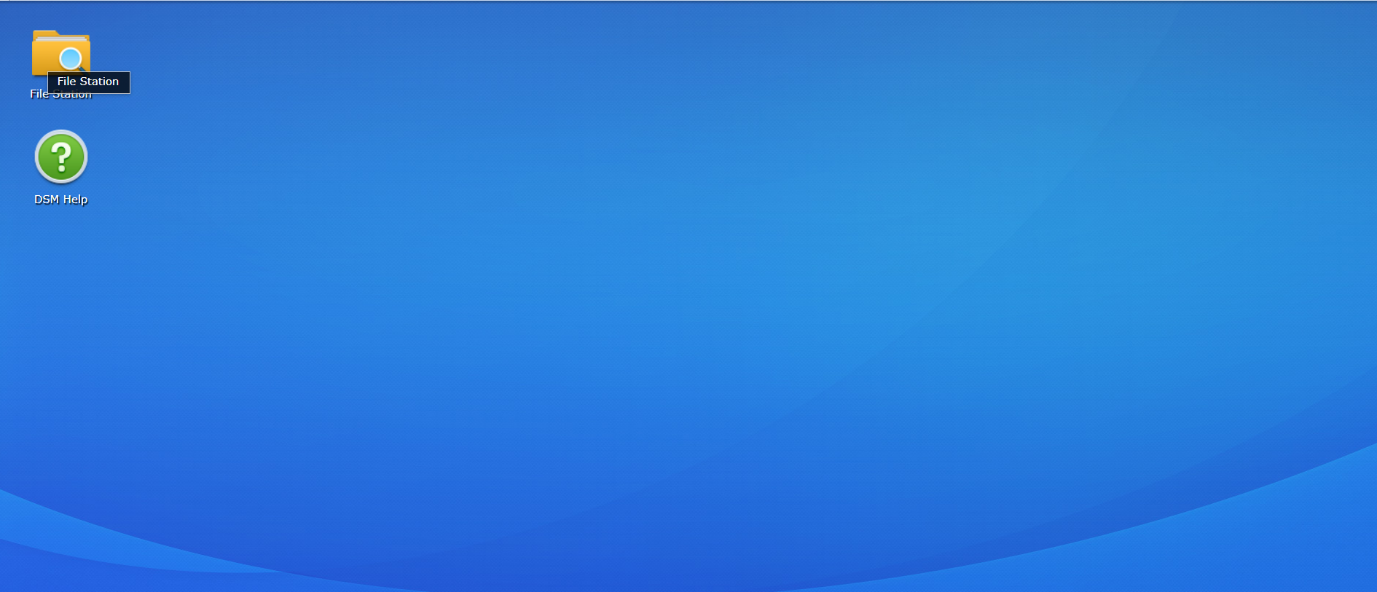
Figure 2 the file station highlighted in yellow folder is the place you access your files
Step 2. Entering the NAS system file station
To access your wedding photography and videos, double-click the yellow icon called File Station, located on the top left hand side of the screen.
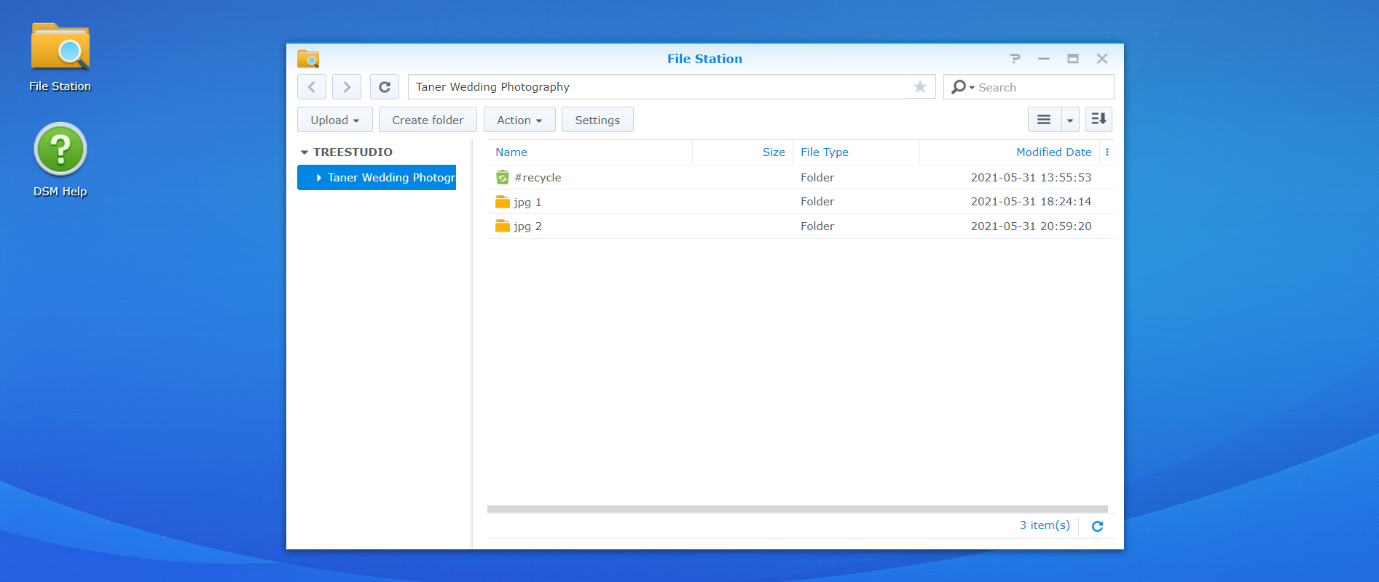
Figure 3 file station home which displays your wedding files in folder
After you entering the File Station, you will see a pop-up window which displays your wedding photography file.
To ensure your clients get a clear clue, we normally create a different folder, such as wedding photography, wedding videography Melbourne and etc.
If you want to see particular folder, you can continue to double click the folder again to go to next step.
Step 3: accessing your wedding photography files
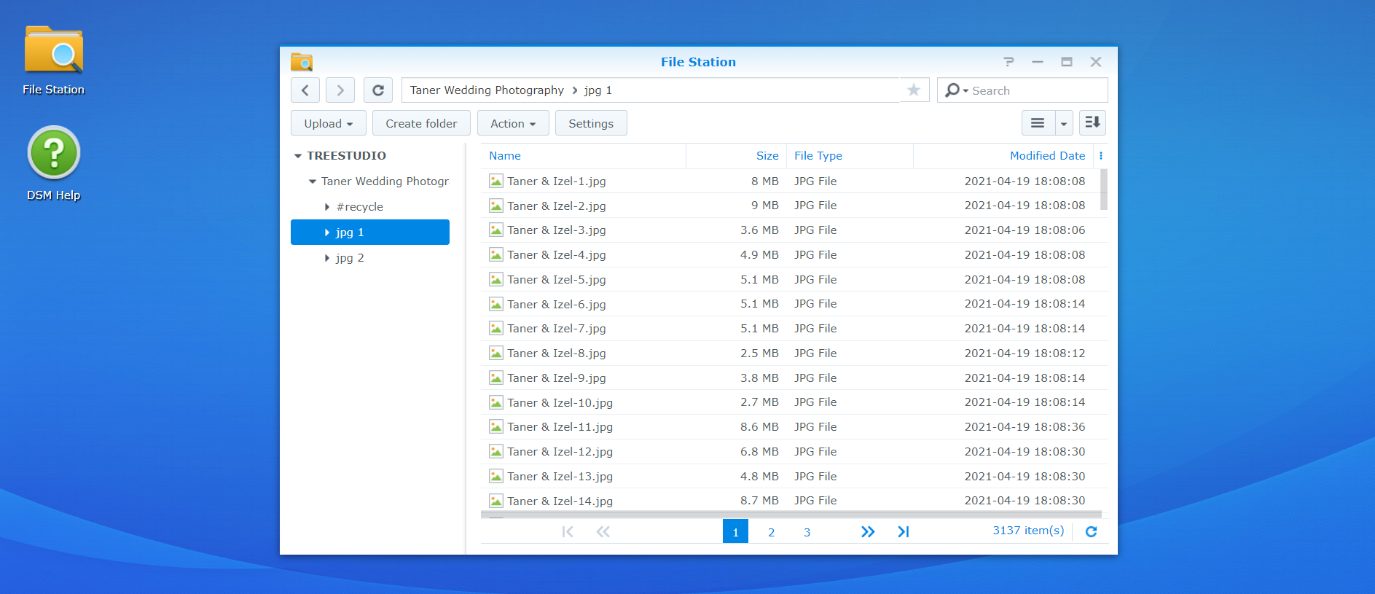
In the default setting, the wedding photography would be showed in a list order. That means that you can start from number one photos to view all your wedding photos, or you can scroll down to hop to other photos. In addition, you would notice at the bottom of window which has the pagination.
The pagination gives you a better navigation, every 1000 photo induce a page. Therefore, you don’t need to scroll down to see every photo.
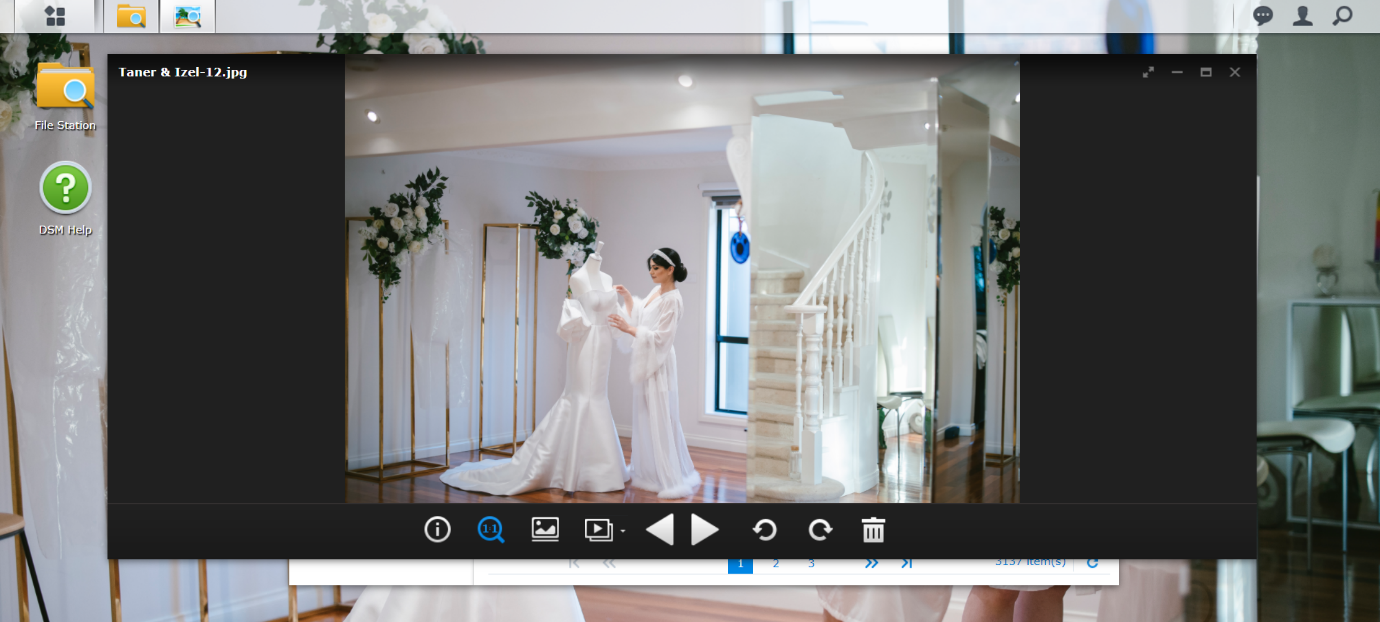
When you click any photos from the list, you would see a pop-up window to display your wedding image. You could click the left and right arrow to view your wedding photos.
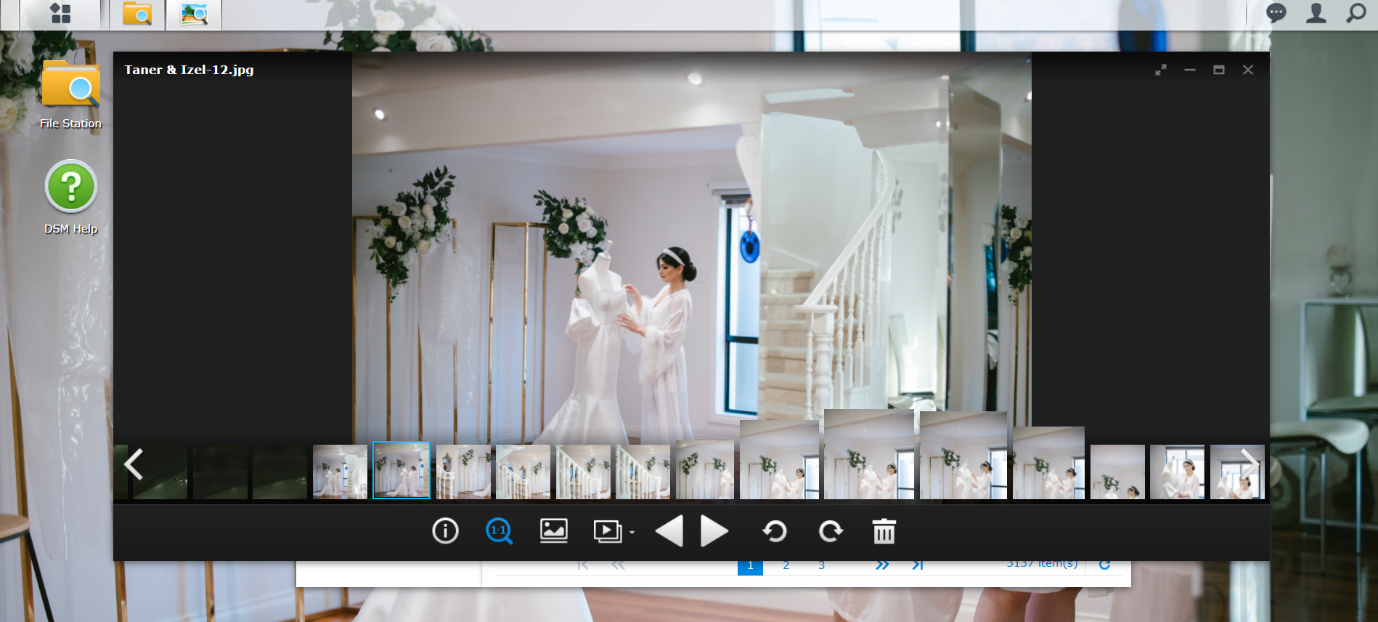
If you move your mouse little bit above the bottom bar, you can find the preview photos between the large image and control bar, therefore you can see the series of your wedding photos.
Step 4 choose different viewing size to preview your wedding image
If you want to see more preview photos or you want to have a glimpse at all photos in a small size. You can close the window and return to the primary menu.

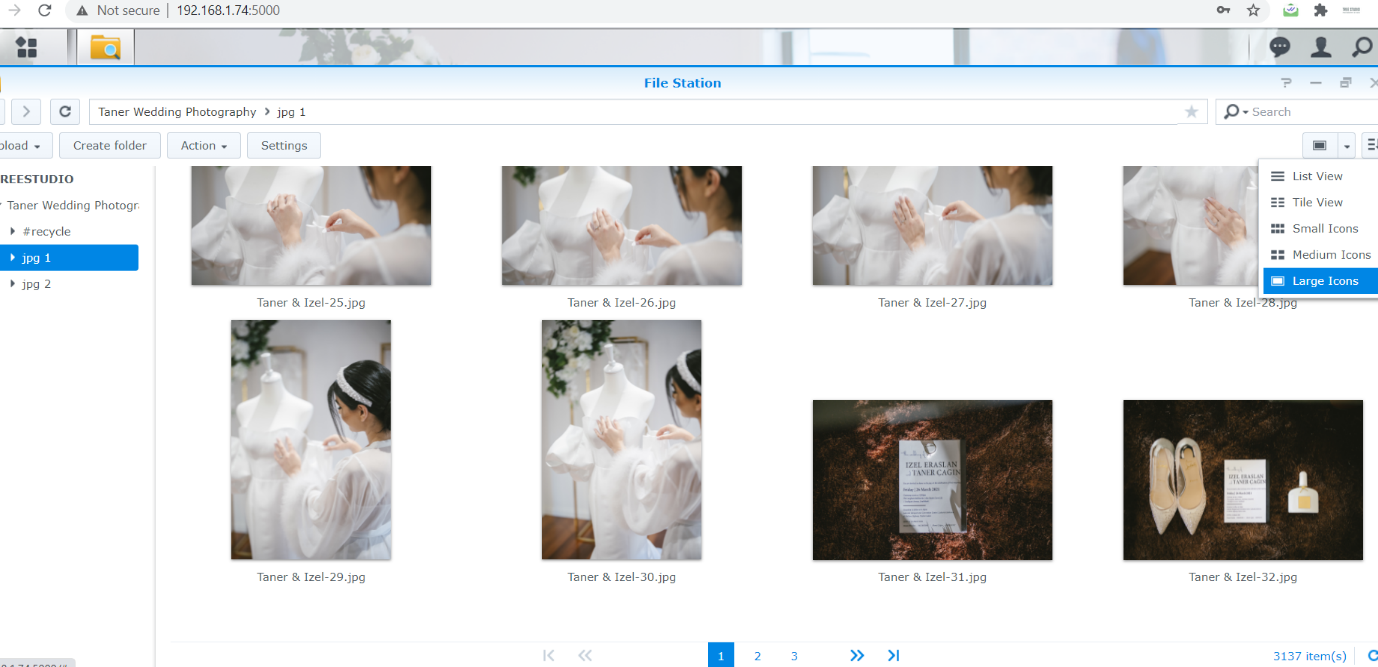
Figure 4 the bar icon on top right corner allows different viewing sizes of your wedding photos
This is a quite handy function in the NAS system, there are some options available in regard to preview styles including: list view, tile, small icon, medium and large icon.
I would recommend you select the large icon; it is a great size to preview your wedding photos.

Preview your wedding photo in a large size.
Step 5: Download your wedding photography in NAS cloud
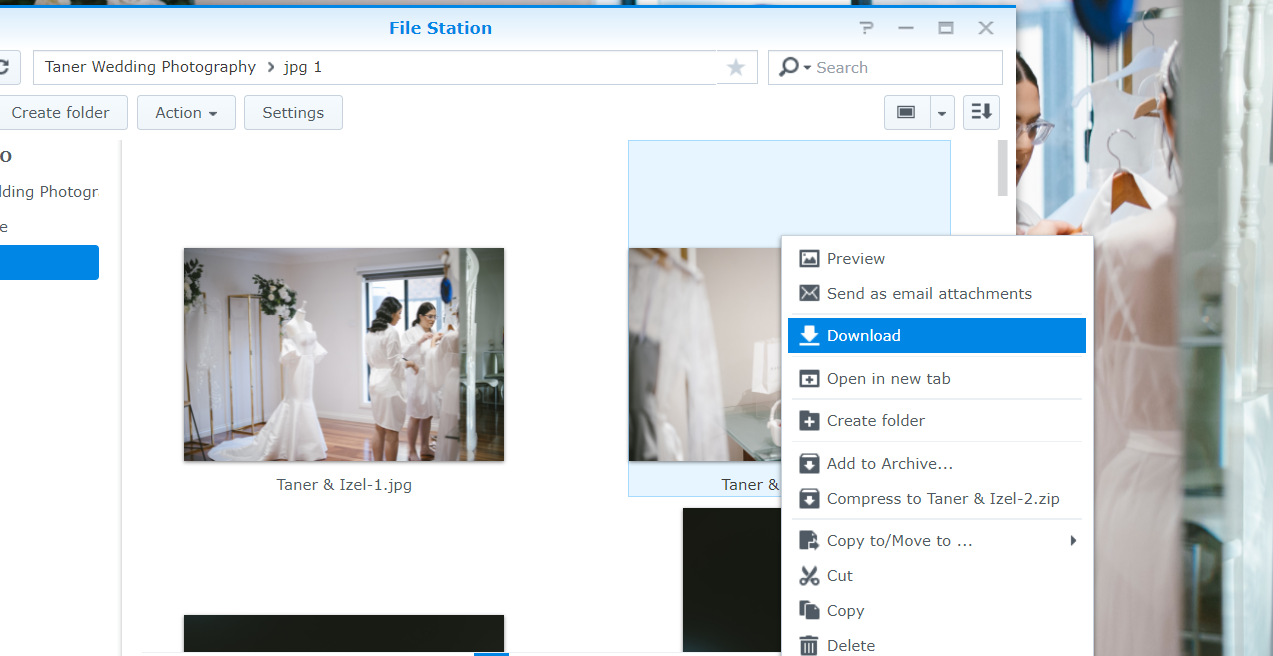
Figure 5 right clicking on the photo allows you to download orginial file
If you want to download any photos so you can have a high resolution copy, you can right click the mouse and you can see the Download function, you can download the photo to the destination folder on your computer.
That’s all.
After you view all your wedding photographs on our NAS cloud system, you can design your wedding album. Here is wedding album design guide.
If you still have any question about using the NAS cloud system, you could contact me or come to our studio at 246 Coventry Street, South Melbourne, VIC, 3205.


